Highlighting VODs & Uploading to YouTube
Have you’ve ever wanted to go back and watch a keyboard build (either by yourself or another streamer) on Twitch, but that VOD had already expired? Or have you ever wished there was an easy way to upload your Twitch VODs to YouTube, but it’s annoying downloading entire keyboard VODs and then reuploading them to YouTube? Well, there’s a feature on Twitch that not many use or don’t know about, called Highlights!
As a content creator, you end up reusing a lot of content across a variety of platforms. For example, Twitch to YouTube, TikToks to Instagram Reels, etc. In this post, I want to talk about how I’ve easily streamlined my process from Twitch to YouTube by using Highlights and how people can always go back to my page to watch a build from many months/years ago. In my opinion, all keyboard streamers should be highlighting their VODs as it saves it forever, unlike normal VODs that disappear after a certain time. I have playthroughs from 6 years ago that people can still watch because I highlighted it. It’s a great way to showcase all your builds, and your highlights will always be there so people can reference back to it.
Overview
So what are highlights or what is highlighting? Basically, Twitch has a built-in editor that allows you to “highlight” segments from your VODs. You can pick and choose which parts to include from your VODs and once you’ve got everything you want, it creates a highlight that you can find on your page. There’s a misconception that highlights are like clips, but clips can only be 30 seconds. Highlights can be your entire 10 hour VOD if you wanted.
There are some drawbacks though. While the editor is easy to use, it’s buggy when it comes to combining different VODs together. I’ve tried on many occasions to combine 2 different VODs together but it never got the right timestamps. For example, say your internet went out and your keyboard build ended up as 2 different streams. While you can try and combine it, it’s easier to just highlight 2 different parts and title it as Part 1, Part 2, Part 3, etc. So if you wanted it as one continuous video, you’ll have to download the two parts and combine it yourself.
But asides from that, let’s get into how to highlight.
Highlighting
There are multiple ways to get to the highlight editor, but I’ll show you how to get there from the Home page. From the Twitch Home page, click on your icon (top right) and then click on Creator Dashboard. Once you’re there, on the left-hand side, click on Content -> Video Producer. From here, you can see all your VODs and next to them will be a highlight button. Pick the VOD you’d like to highlight, click the highlight button, and it should take you to a new page.
The next thing you should see is the highlight editor which looks like this.
If you’d prefer to watch a video on this process, I’ve highlighted that here : https://www.twitch.tv/videos/1603604997
Starting from the top left, there are a couple things you can do here. When you click “+ Add New Highlight”, you can create multiple different highlights from one VOD if you’d like (example there were funny moments that you’d like to highlight and have them as separate videos). You can also add a highlight from another VOD (same button but drop-down) but as I said above, it can be buggy.
The first box is your title and the second box is the category you’d like. On the video player, the yellow bar is indicating which parts you’re highlighting.
Down below, that’s the timeline of your VOD. From here, you can pick where to start the highlight, when to end it, and add different segments if you’d like. The yellow lines are where people have clipped and you can also put markers during your stream that will show up in the timeline.
Using the purple bar, this is what you use to adjust the highlighted segments. You can pick where to start/end each segments, as well as split, remove, or add new ones. You can drag the purple bar and it’ll play on the video player above. The other buttons will show you what they do when you hover over them, so I won’t get into detail about those. The big yellow bar on the timeline represents which parts will be included in your highlight. But basically, pick a start and an end for your highlight (using the purple bar) and when you’re ready, you can click the big purple button above, “Publish Highlights”.

This should take you back to your Video Producer page where you can edit the highlight even more if you need, including putting it in a collection, adding a description, uploading a custom thumbnail, etc.
I’d recommend creating a collection (a playlist) so people have something that they can easily refer back to. You can create collections by going back to your Dashboard and under Content -> Collections. Once you’ve created the collection, you can add whatever videos you’d like.
Unfortunately you cannot add any additional tags, you have to be sure to add tags before you start your stream. Once you’ve added everything you want to add, be sure to press “Save Changes” in the bottom right.
From here, you can also export highlights to YouTube. Make sure your YouTube account is connected, you can connect it from clicking on your icon (top right) -> Settings -> Connections and enter your information for YouTube.
Exporting to YouTube
Once your account has been connected, when you press the Export button, you’ll get another pop-up that looks like this. I’d recommend leaving the description blank and editing that later on YouTube. I would not recommend splitting the video into 15 min segments unless you have a really good reason to. Make sure you don’t put any special characters in the title, YouTube doesn’t allow special characters and your export will be rejected. You’ll get an email if your export is successful and you should find the video in your YouTube channel after a little bit.
This process has made it extremely easy for me to upload all my VODs to YouTube without having to download each VOD. The drawback is that it’s a raw edit so if you want to add stuff, you will have to download the VOD, edit it, and upload it to YouTube. But if you’re ok with the raw edit, this way is really convenient.
Another thing to note is if VOD on Twitch is muted, that will also be translated to YouTube. So just be aware of that, especially if you play DMCA music. If you’ve noticed, my VODs don’t have any background music, but I play music during my streams. While it can be awkward for people who watch VODs, it allows you to listen to whatever you want without worrying about muted parts and it helps out editors too.

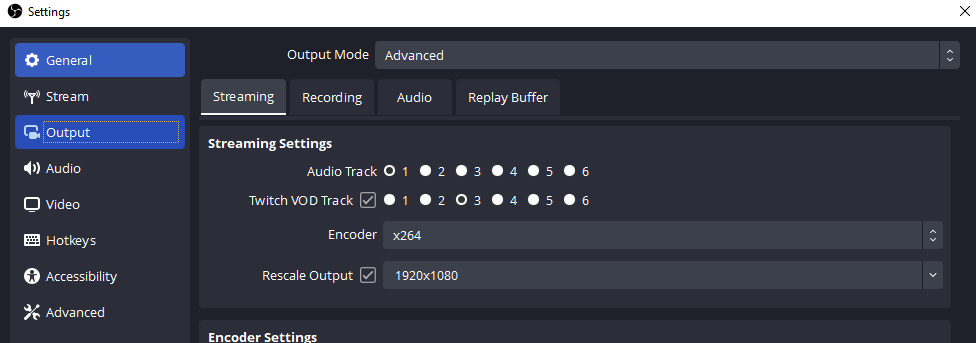
This is a whole other process, but you have to split your audio to have your music on a different audio track. In OBS, you can pick which audio tracks get recorded to your VODs as shown in the photo.
Here are some videos you can watch if you’re interested:
https://youtu.be/aOrAsQgJvtQ - Splitting Audio
https://youtu.be/ZwnD3tjhPO4 - Excluding music from your Twitch VODs
Customizing your Channel
Now that you’ve created your highlight, how do people find it? I’d recommend customizing your Twitch page’s layout so it’s easily found.
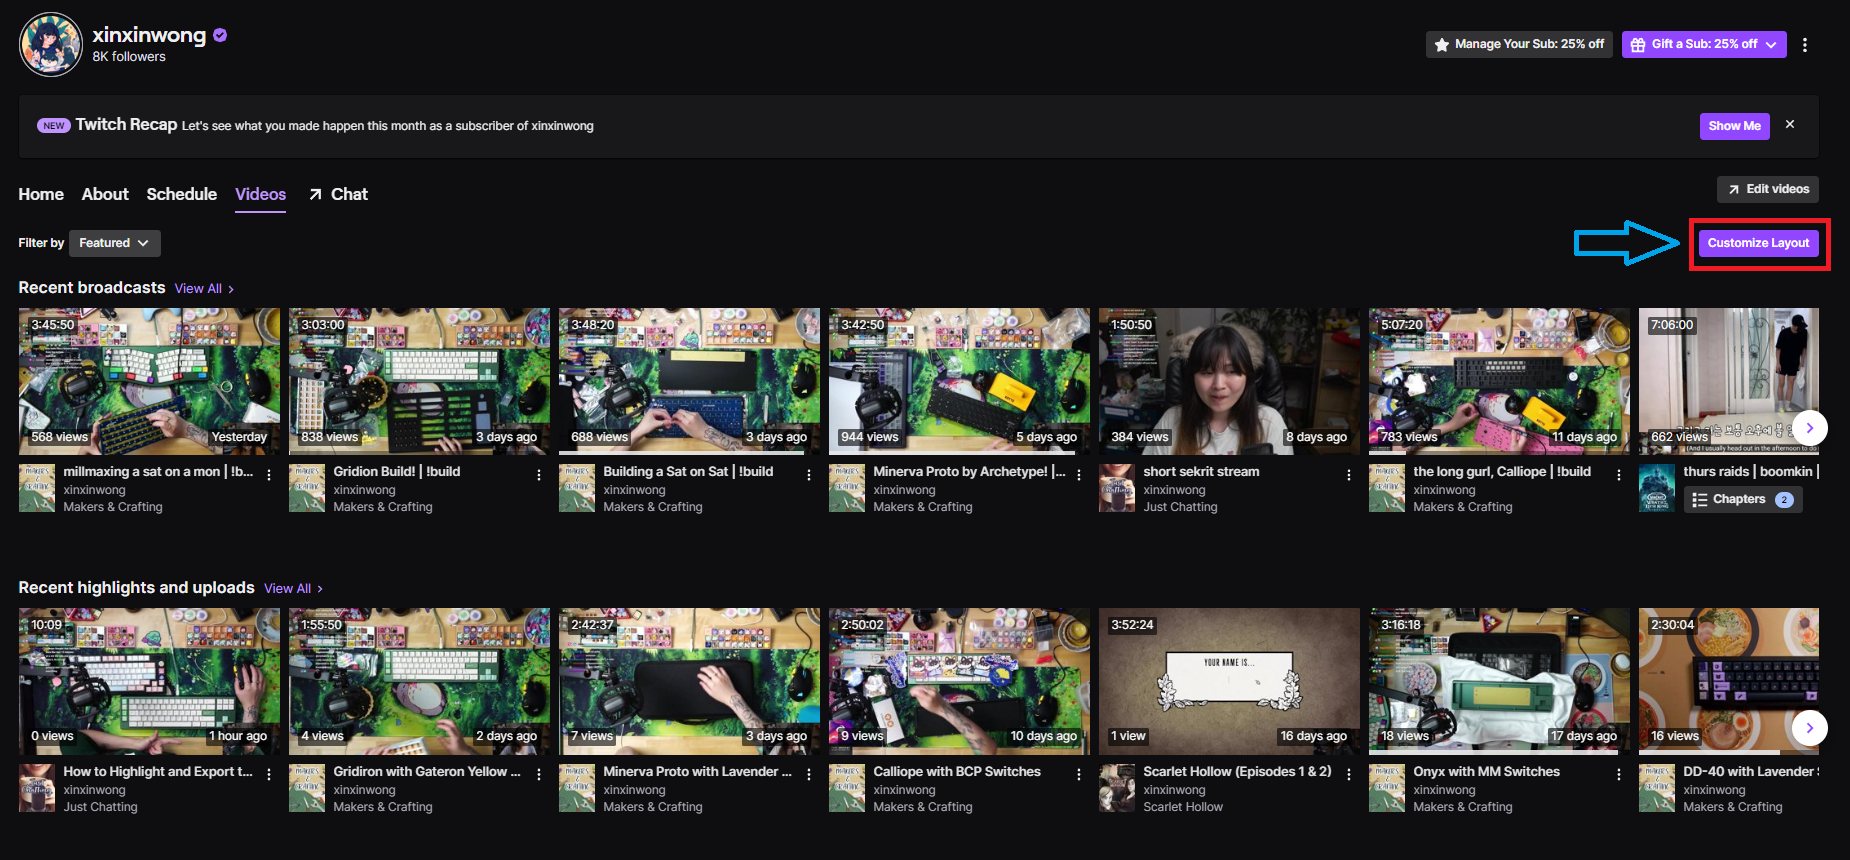
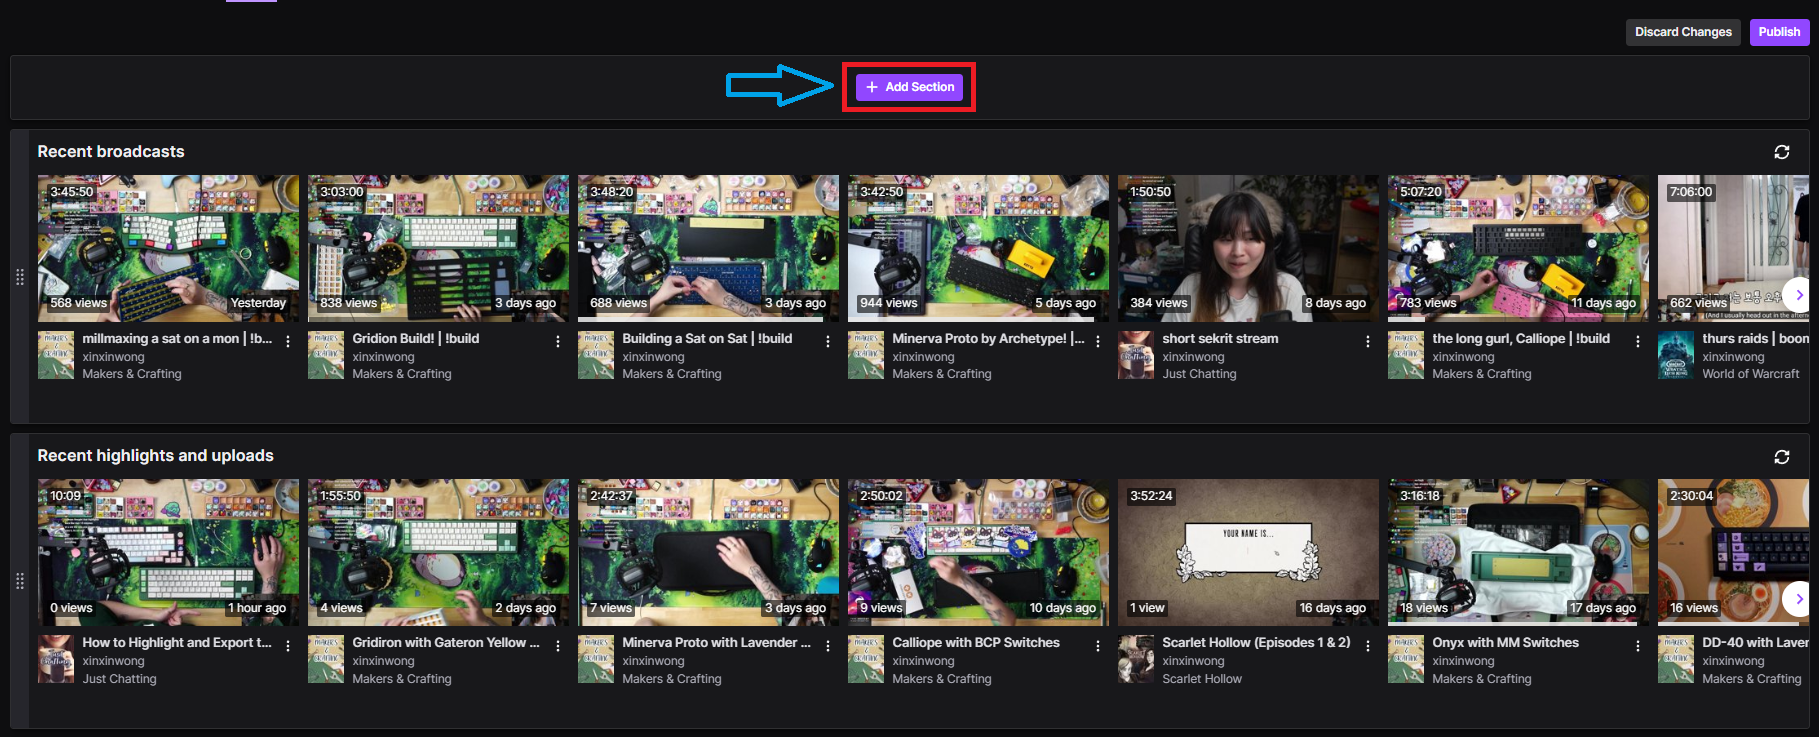
On your Twitch page, click on Videos and it should have your Recent Broadcasts + Recent Highlights and Uploads listed. You can pick what is showcased when people go to your Videos by pressing the “Customize Layout” button and then “+ Add Section”. I’d recommend adding whichever collection you’d like people to see. So for keyboard builders, I’d recommend featuring your keyboard builds collection. You can order it however you’d like! I have recent broadcasts, recent highlights and uploads, clips, and keeb collection. By highlighting and featuring your collection, now people can easily find it from your page.
As for YouTube, I’d recommend linking the highlight video in your YouTube video description so people can find your Twitch as well.
Closing Thoughts
Highlighting your keyboard builds is an easy way to keep everything organized and passively grow other platforms which can also help your Twitch channel grow. Searching for past builds on Twitch is awful though, and YouTube is superior in that aspect by far. I’ve had many people who came from YouTube first because they watched one of my VODs, so I’d definitely recommend uploading what you can from your Twitch to YouTube, even if it’s a 3 hour VOD. You can go the extra mile and add timestamps to your YouTube videos if you’d like, but I’d say skimming through a long VOD is easier on YouTube than it is on Twitch. It surprises me that not many people use highlights, but I also learned that not many people know about it. I’d definitely recommend using this Twitch feature though! Hopefully this helped you, and if you have any questions, feel free to reach out to me and/or join the Discord 🐸
- XXW